Created by Mike Donghia. Subscribe to our blog for free daily updates.
Big, leafy indoor plants have been all the rage and one of the most popular fads for the past few years. They’re obviously not a new thing, but it seems that every new home turns to these green beauties to decorate and fill each nook and cranny of space.
But for me, indoor plants have become more than just a fad or pretty decoration. Over the past decade of learning how to take care of them, I’ve grown to appreciate the process and seeing my plants thrive with good care.
I love the weekly routine of watering, feeding, and tending to my plants. I love seeing the physical growth that results from my dedication to them. I love that I can share the growth with friends by propagating or dividing plants. I love the air purifying effects that they emit.
But like many things in life, taking care of indoor plants isn’t “set it and forget it.” You can’t simply find a pretty plant, place it in a cute pot, and call it a day. It takes knowledge of what that specific plant needs and a routine for caring for it.
So in this post I’ll share my top 6 tips that I’ve learned about how to take care of indoor plants. I’m no plant expert and I do still manage to kill some plants each year, but I’ve learned a lot and now have a collection of happy plants that are more than just a decoration in my home.
1. Locate the best spots in your home
If there’s one thing I’ve learned about how to make plants thrive, it’s this tip. Most house plants don’t require a lot, but they do require sunlight. Even the best low-light plants require sunlight, so this is essential.
You want to find spots in your home that receive between 4-8 hours of natural light. Each plant varies with how much light they prefer, so make sure you know that before placing it in it’s home.
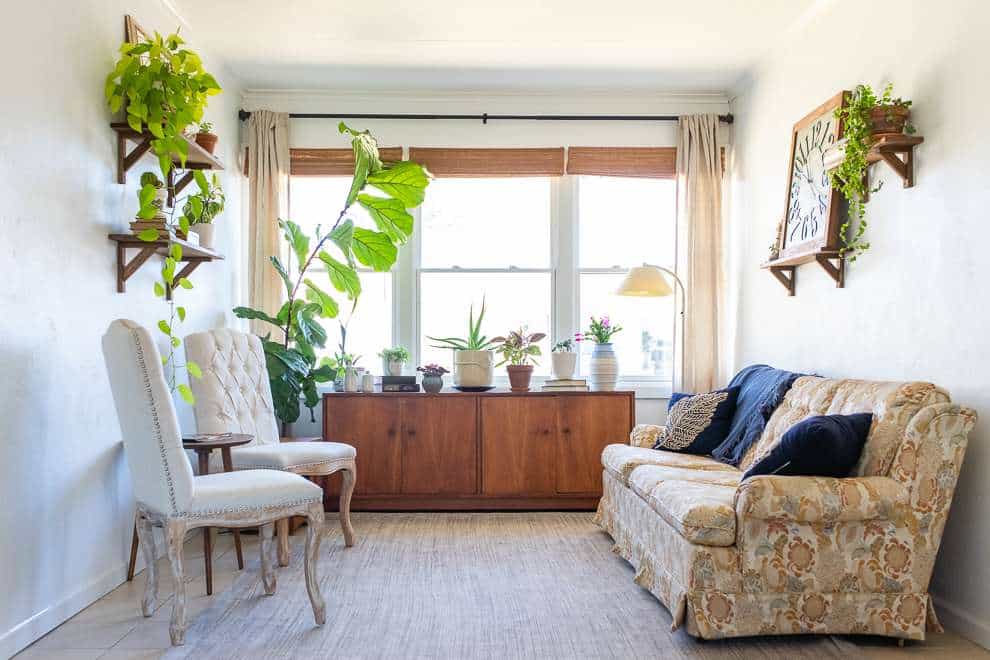
I aim to place all of my plants within several feet of a larger window. The majority of my plants are in our playroom/sunroom, where we have both east facing and west facing windows, which provides bright but indirect light most of the day.
Other go-to spots around our house are on windowsills, a dresser near a window, in a hanging planter beside a window, side tables close by a window, or if it’s a larger plant I love to place them on the floor near a window. See the commonality here? Plants need to be near windows.

2. Choosing the right plants to fit your space
After you determine some well-lit locations in your home, you can then move onto the fun part– deciding which plants you’ll bring home from the greenhouse. Many greenhouses are divided into sections called “bright/medium” and “low light”.
Make sure you’re aware of what type of light is needed for the plants you choose so that it can properly grow. Just check the tag inside the plant. It can be overwhelming knowing which plants will do well in the space you’ve got, so here are my favorites that I’ve successfully kept alive for years. These are all low-maintenance plants that are pretty easy to care for if you place them in the right type of light.
Low-light plants (placed near a smaller window or about 5 feet away from a larger window)
- Pothos
- Snake plant
- Philodendron
Medium or brighter-light plants (plants that need about 8 hours of indirect sunlight a day)
- Jade
- Hoya
- Rubber plant
- Nephthytis
- Christmas cactus
- Aloe
- Fiddle-leaf fig
- Monstera
- ZZ plant
3. Potting and repotting plants
There’s so many pretty pots to choose from but here are a few suggestions I have when potting your new plants.
Choose a pot with a drainage hole. Many plants (especially succulents) like to dry out between waterings, so if there’s no drainage hole this could lead to root rot and bugs. If your pot doesn’t have a drainage hole, fill the bottom few inches with small rocks. I recommend using ⅝ inch river rock, which can be found at most greenhouses.
The size of the pot is also important. Try to find a pot that is about the same size as the pot you bought it in from the nursery (or just a bit bigger). Roots like to be contained and snug.
Use a soil that has nutrients in it. There are many different brands, but make sure it’s a potting soil rather than just dirt from your backyard.
When your plant stops growing or water runs through it quickly, it’s probably time for a new pot. To repot, carefully take the plant out of its pot. Loosen the plant’s roots with your hands. Remove the old soil from around the plant. Pour a layer of fresh soil into the new pot (don’t forget to add small rocks to the bottom of pots with no drainage holes). Place the plant into the new pot and gently pat some fresh soil around it to keep it snug. Then give it a good watering.
4. Have a regular watering and fertilizing schedule
Having a regular watering schedule has been one of the main reasons why I’ve had success with keeping my plants alive and thriving. I’ve come to look forward to this routine each weekend and instead of looking at watering my plants as just another chore, it’s an enjoyable task as I carefully take notice of any new growth or what each plant may need.
I’ve developed a weekly watering schedule that fits about 75% of my plants. There’s not a one-size-fits-all approach to watering plants, so this goes back to knowing what your plants need.
Every Saturday I water my plants. I water all of them except for a few succulents, my cactus, jade plants, and snake plant (these plants like to be watered less frequently). If you’re not sure if your plant needs to be watered, stick your finger in the soil about 1-2 inches. If the soil seems dry, it’s time to water it. Too much water is the #1 reason why houseplants die.
5. Fertilizing, pruning, and cleaning your plants
In addition to my weekly watering schedule, I also like to give my plants some extra care and nutrients.
Once a month, I gather most of my plants onto my kitchen table. I find it easiest to have them all in one spot so the mess I make is contained on the table. I aerate the soil, prune any dead growth, clean the leaves with a spray bottle, and fertilize them. I explain how I do each of these steps below.
Aerating the Soil– Do you ever notice that your soil becomes clumpy or hard? To help with this, I take a spoon and sift through the top inch of soil, breaking up clumps and making it look more healthy. This helps the soil to drain more quickly and not get so soggy.
Pruning– Oftentimes, some leaves on plants need to be removed to make room for healthier new growth. When I prune plants (especially pothos, philodendron, and succulents), I pick off any dried up or yellow leaves.
Cleaning– Since many indoor houseplants come from tropical locations, they prefer humid air. To help with this, I mist most of my plants with a spray bottle about once a month. This helps to clean any dust that accumulates on the leaves as well as give them an extra boost of moisture. You can use water but I’ve also found that thieves household cleaner works great for adding some extra nutrients to leaves too.
For plants that have larger leaves, I then wipe their leaves with a clean microfiber cloth to get the dust off. This makes a big difference with how vibrant and shiny the leaves look.
Fertilizing– Most plant fertilizers consist of Nitrogen-Phosphorus-Potassium (a N-P-K ratio). Certain plants like higher levels of each of these, but I’ve found that instead of having many different fertilizers, I stick with a basic All-Purpose Plant Fertilizer. Plants really don’t need to be fertilized in the winter months since the amount of sunlight doesn’t make them grow as much. The one I use recommends every 7-14 days, so I aim to feed them about every 2 weeks.
6. Propagating your plants
One of the best parts about many indoor plants is the ability to propagate (the process of creating new plants) and grow yourself another plant. I’ve propagated several different kinds of plants and it’s actually a very easy thing to do.
To propagate a viney plant such as pothos or philodendron, snip off a cutting that has several leaves on the stem. Place the stem in water and wait for roots to grow (typically about a month or until you have an inch of new roots). Then place the stem into a pot with fresh soil.

I’ve also had success propagating cuttings from my fiddle leaf fig plant. You’ll want to have 2-3 leaves in each cutting but make sure to leave about 6 inches of stem so the water isn’t touching any leaves. Wait until about 1-2 inches of roots grow and then place it in it’s pot.
Succulents are also great plants to propagate. The easiest way is by sticking the leaf itself (the fleshy part) straight back into the soil.
I hope you found this post helpful in your plant growing journey. If you’re new to indoor plants, I recommend starting with one or two plants at a time. Learn how to care of your plants, become dedicated to watering and feeding them, and enjoy the journey of watching as they grow and produce fruit.

If you enjoyed this article, please support my work by subscribing to my daily newsletter.